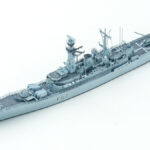
前回完成した艦橋主要部を船体に取り付け、艦橋上部を組み立てます。
前回の工作はこちらへ

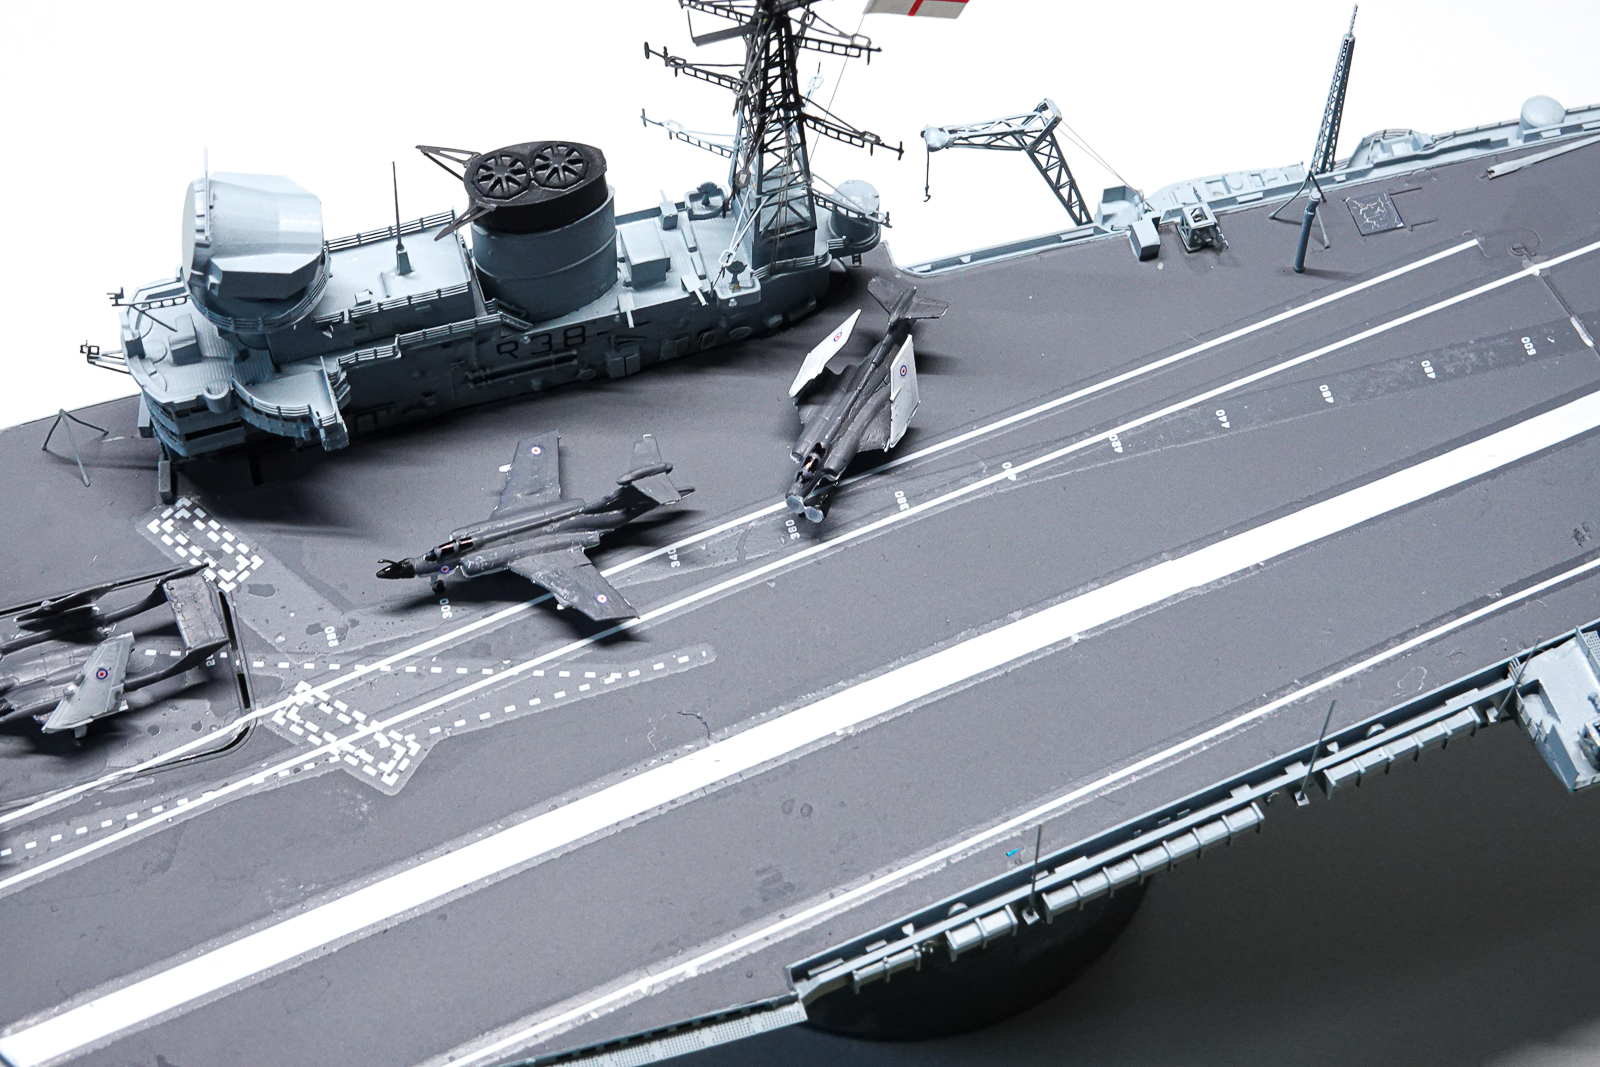
艦橋の取り付け
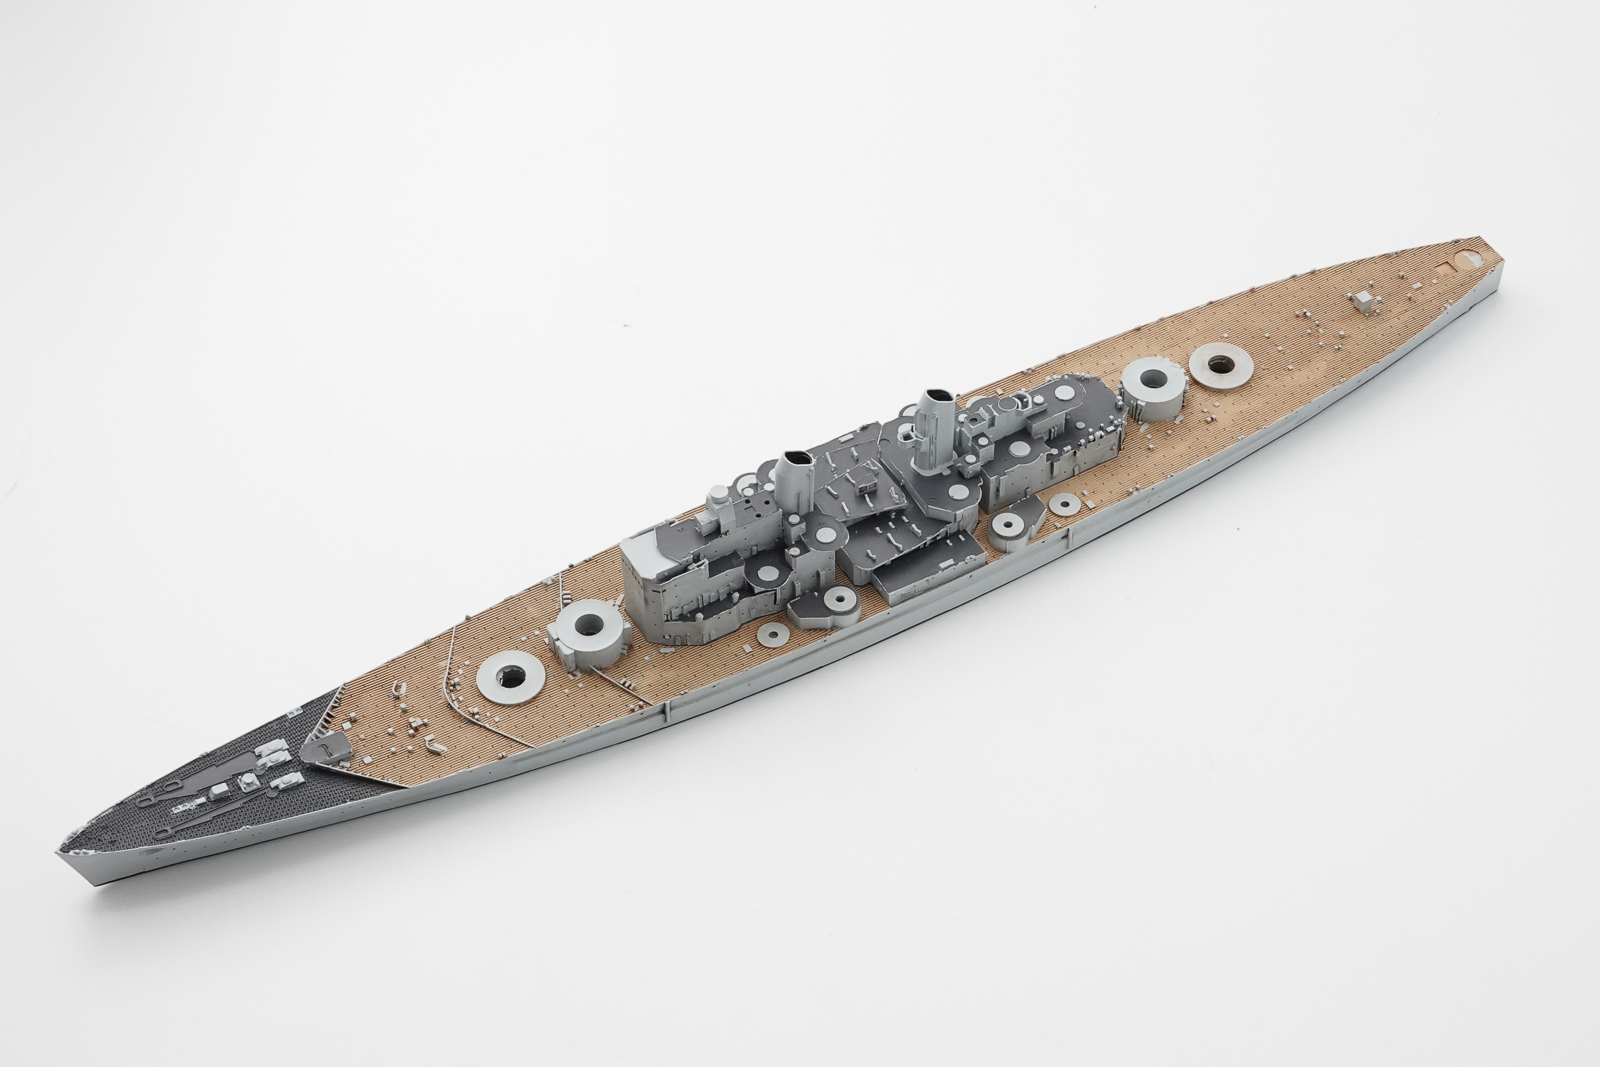
船体に艦橋を取り付けます。船体側も艦橋側も接着面はマスキングテープを貼っていました。プライマーなどを間に挟まずレジンとレジンを直接接着した方が強度は高いからです。
Attach the bridge to the hull. Before painting, masking tape was applied to the adhesive surface on both the hull side and the bridge side. This is because the strength is higher if the resin and the resin are directly bonded without sandwiching a primer or the like.
接着には瞬間接着剤ではなくエポキシ系接着剤を使用しました。タミヤのエポキシ系接着剤なら5分硬化タイプで、位置決めの作業時間が取れます。
I used an epoxy adhesive instead of an instant adhesive for bonding. Tamiya’s epoxy adhesive is a 5-minute curing type, which allows for positioning work time.
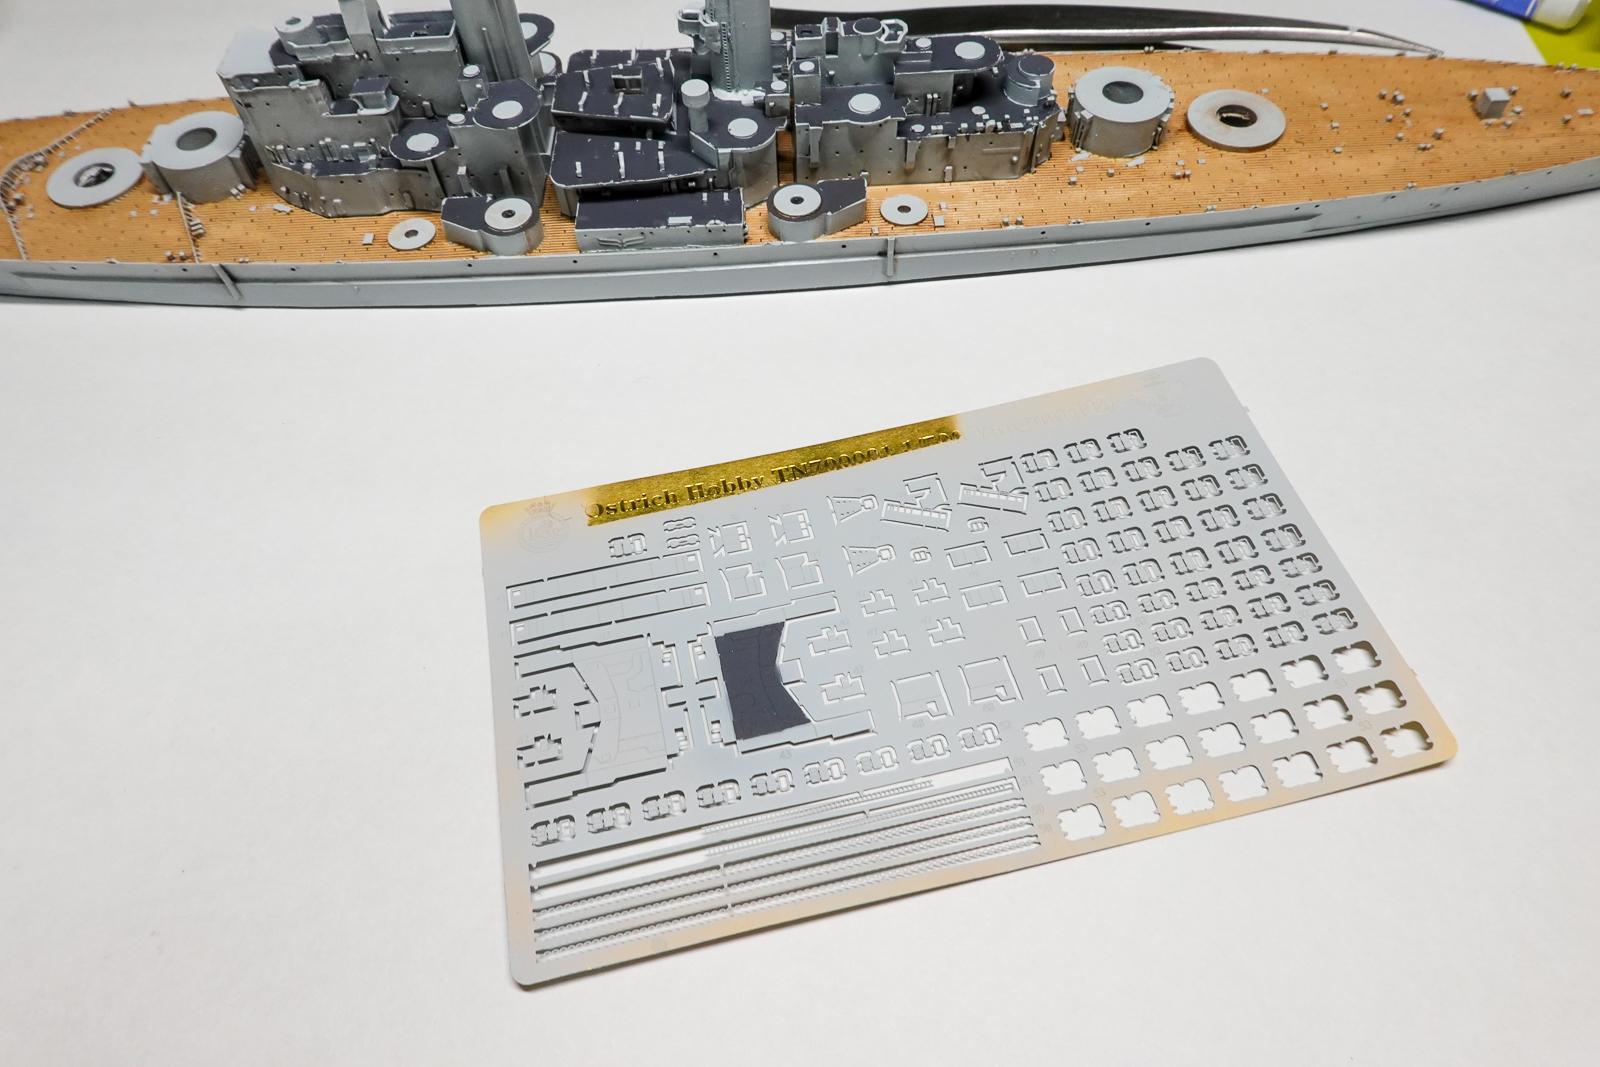
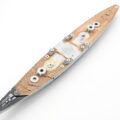
艦橋エッチングの組み立て
次に艦橋上部前方のエッチングパーツを組み立てます。
Next, assemble the etched parts in front of the upper part of the bridge.
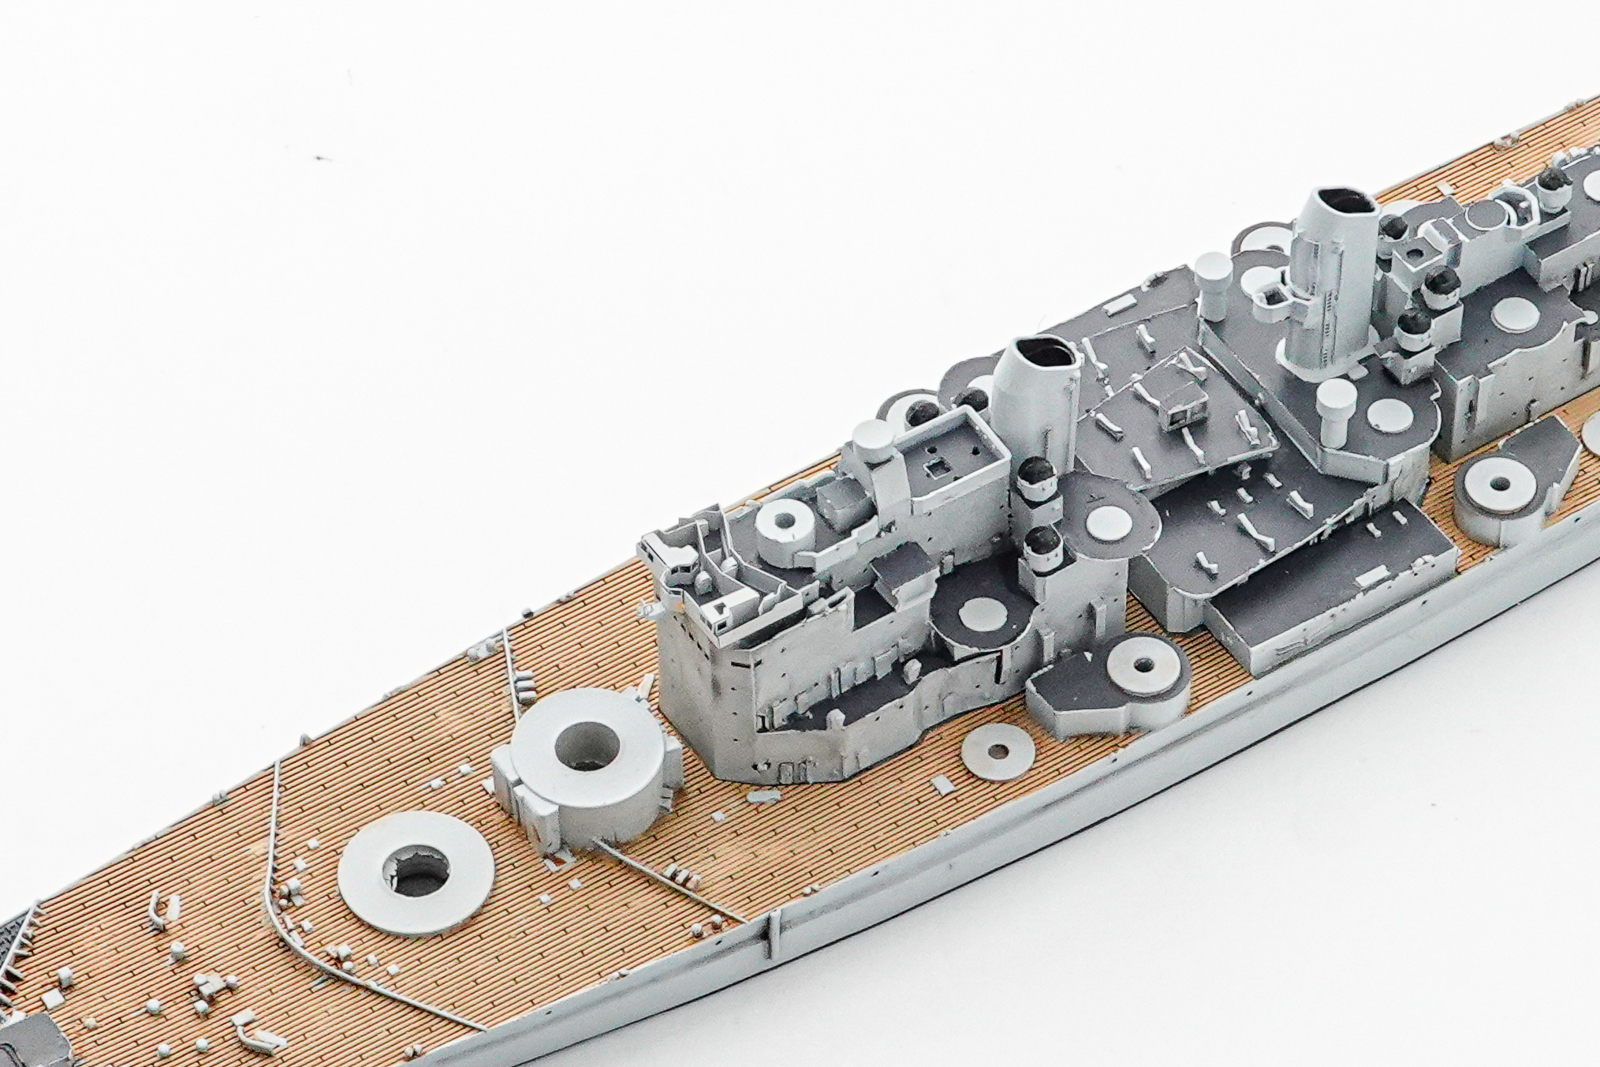
別に塗装してから組み立てます。床部分以外の水平面は実艦写真を見る限り垂直面と同じライトグレーに見えるので、床部分以外はライトグレーで塗装しました。
Assemble after painting separately. The horizontal surface other than the floor part looks the same light gray as the vertical surface as far as the actual ship photograph is seen, so I painted the part other than the floor part with light gray.
エッチングパーツの箱組をいくつか組み合わせるのでシャープさは素晴らしいのですが、小さいエッチングパーツを小さく折り曲げないといけないので、なかなかの手間でした。
The sharpness is great because I combine several boxes of etched parts, but it was a lot of work because I had to fold the small etched parts into small pieces.
投稿者プロフィール

-
模型好き。カメラ好き。各模型雑誌で掲載多数。
艦船模型、飛行機模型、AFV模型などプラモデル全般の制作代行も承っております。「お問い合わせ」からご連絡ください。製作代行ご案内のページは現在概要のみを公開しておりますが、2025年6月現在納期はご相談になりますが、制作代行可能です
 製作代行について(β版)2024年4月6日詳細な製作代行などはのちに追加しますが、お問い合わせのあった方の最初のご案内メールの定型文を記しておきます。製作依頼の流れ1 キットに入っているパーツのみでの制作は、定価×6を基本価格としております。 キットをお送りいただ...maidoworks.com2024.04.06


コメント