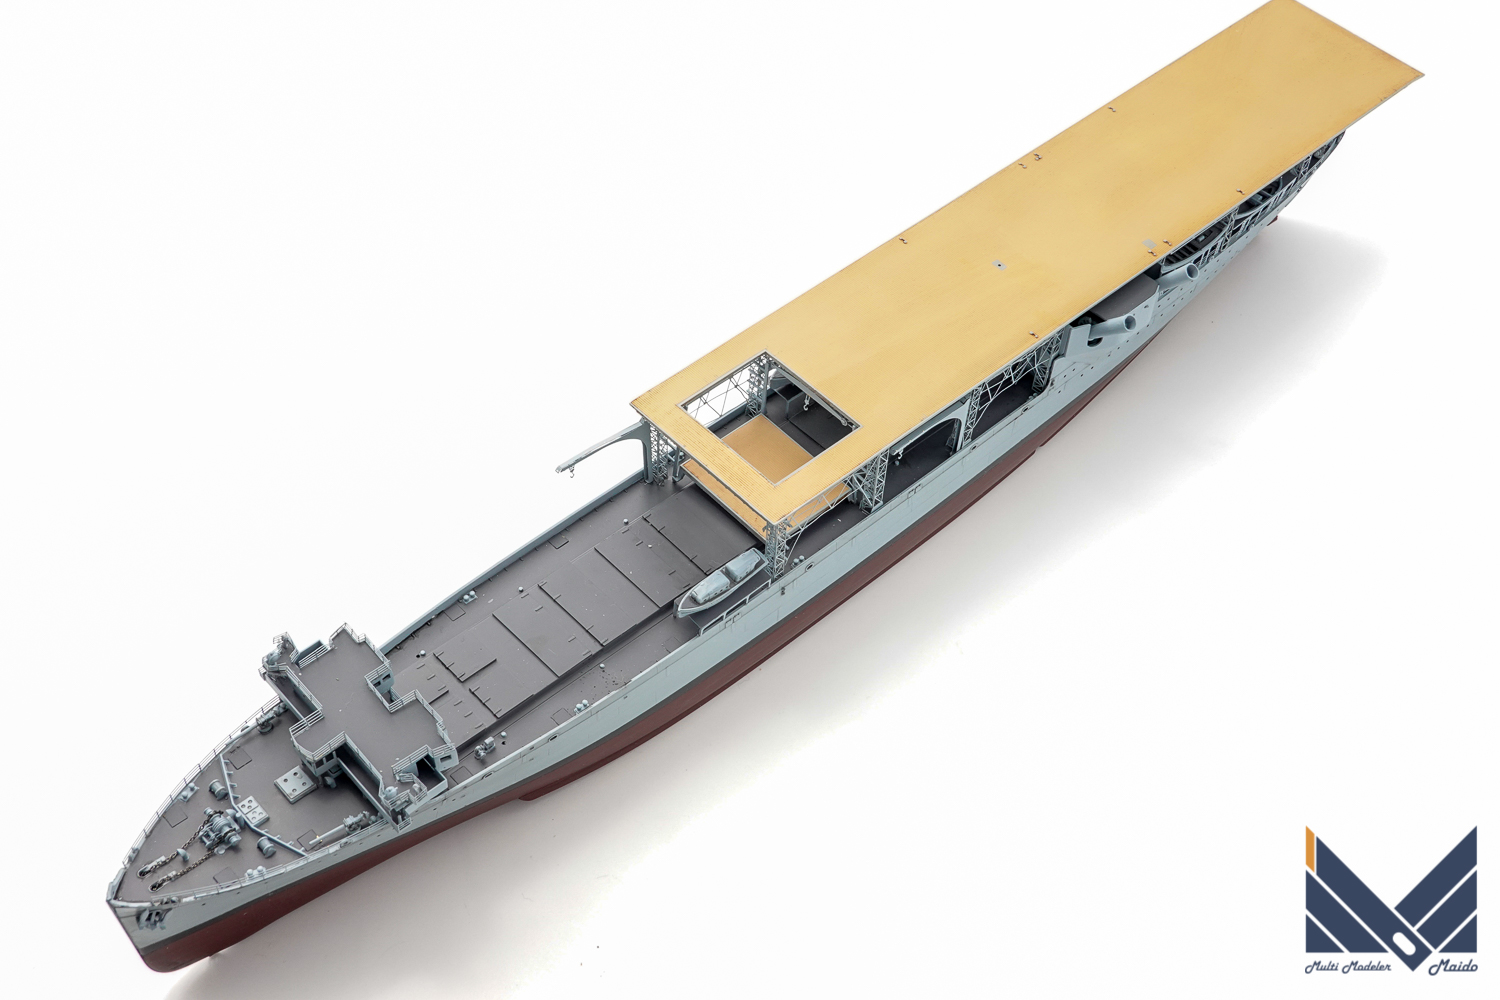
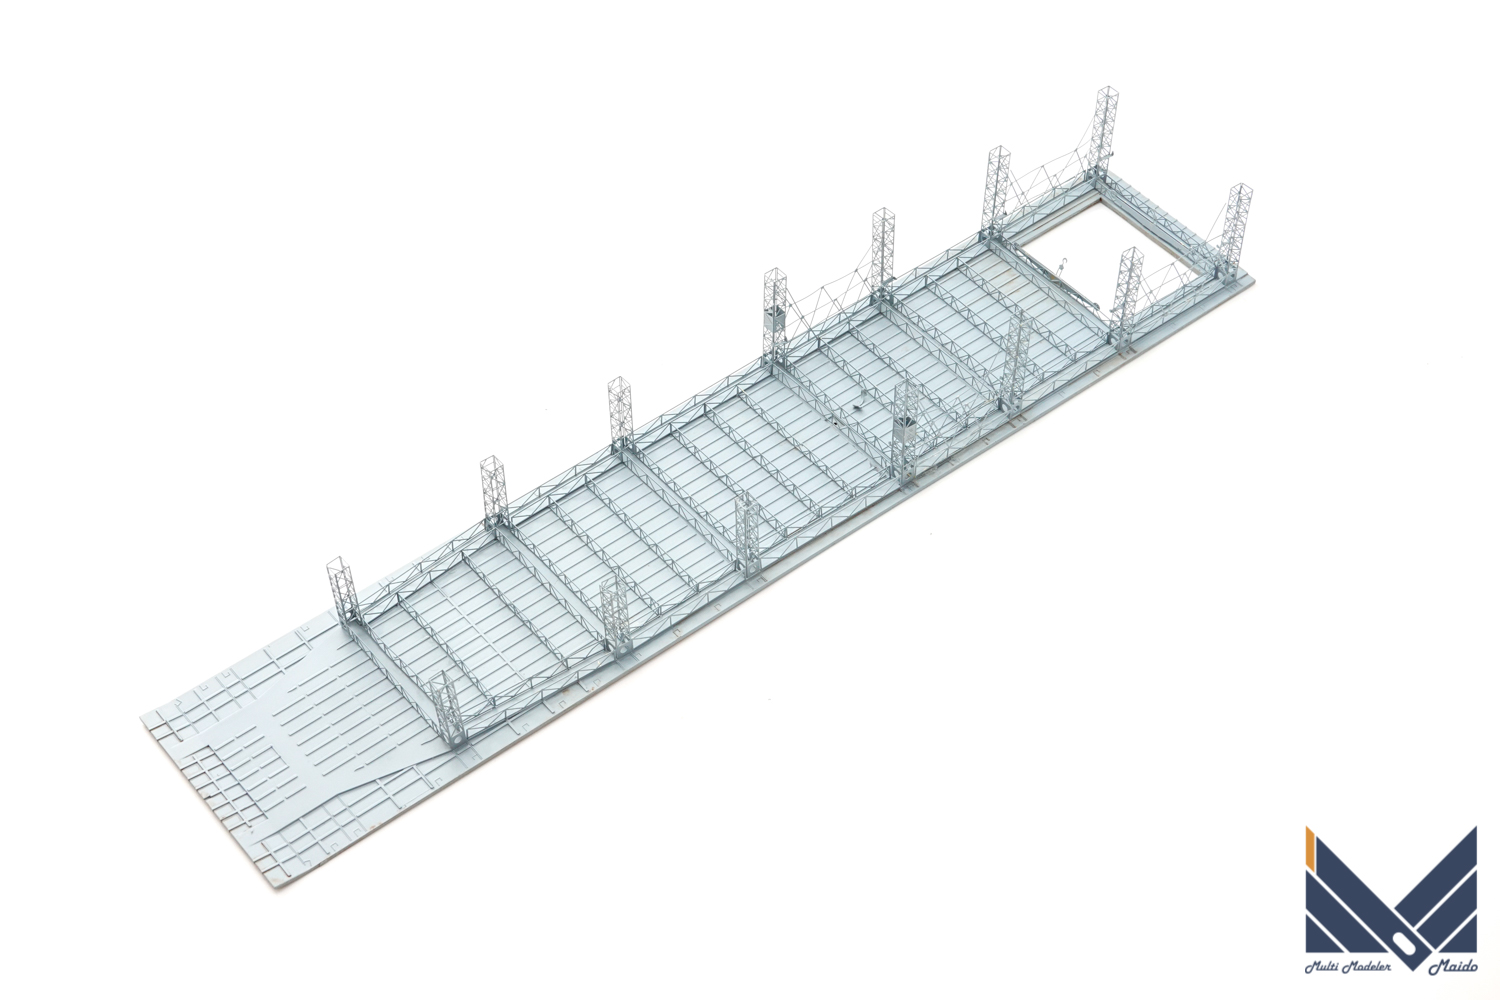
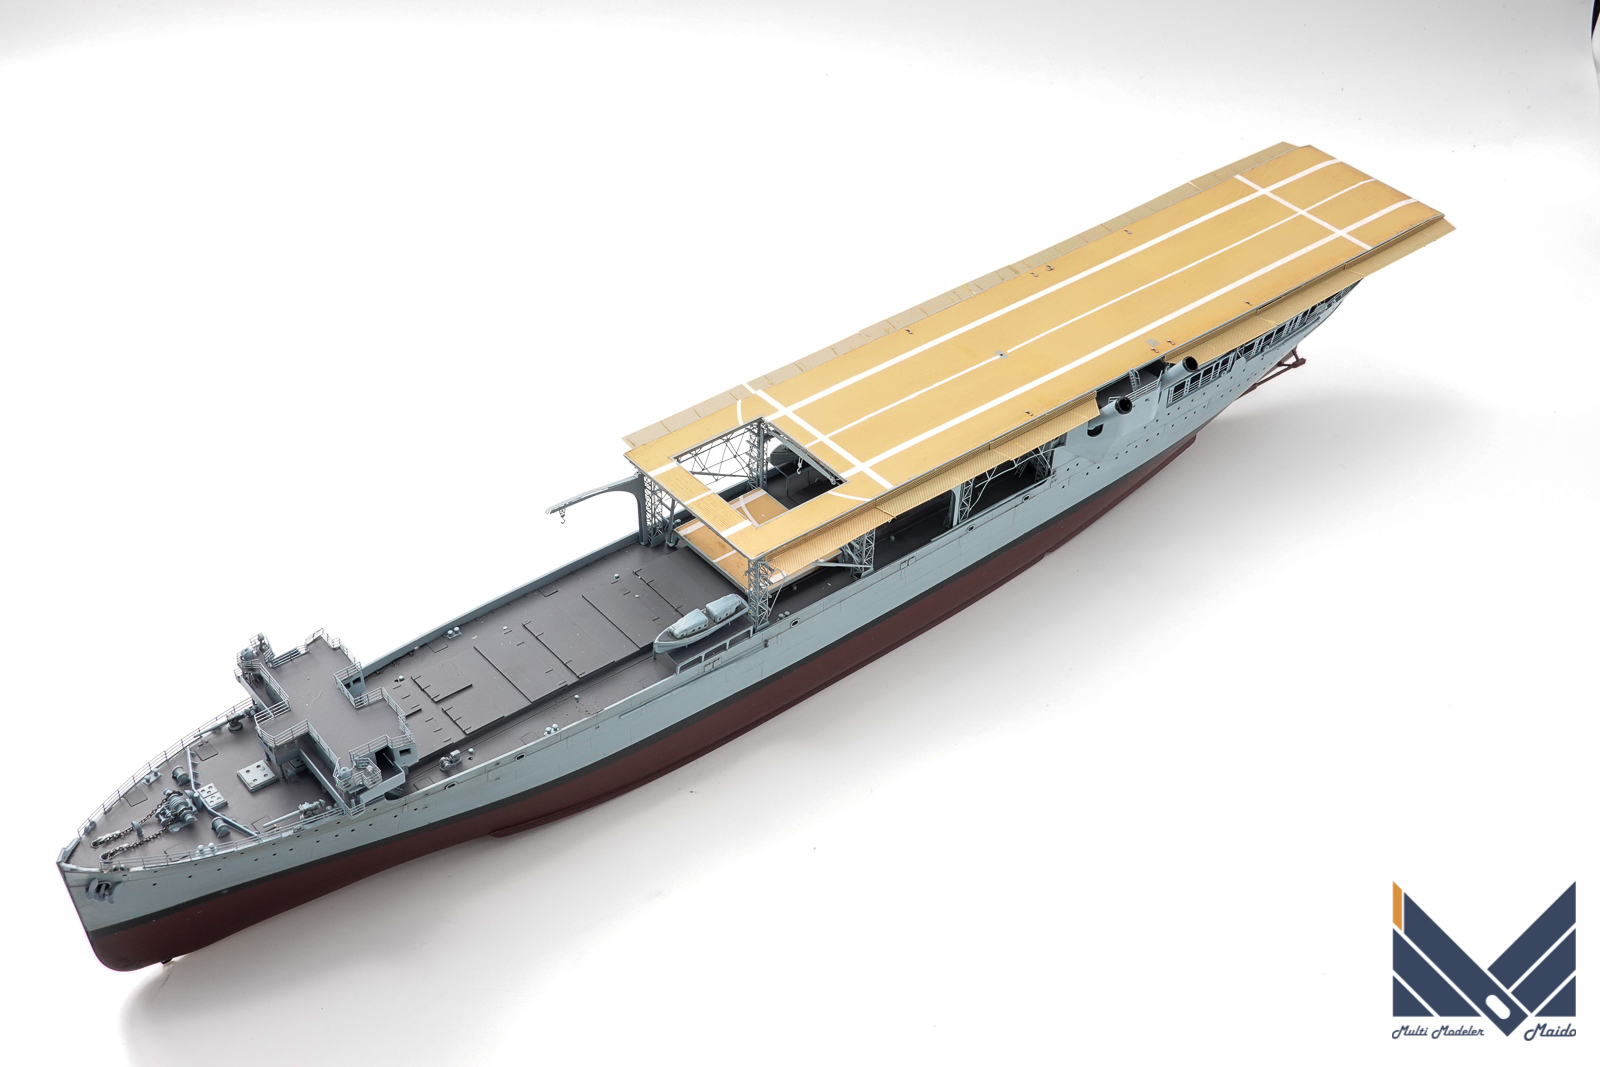
飛行甲板下のトラスの主要部の取り付けを完了して、船体と飛行甲板を接着しました。
After completing the installation of the main part of the truss under the flight deck, the hull and the flight deck were glued together.
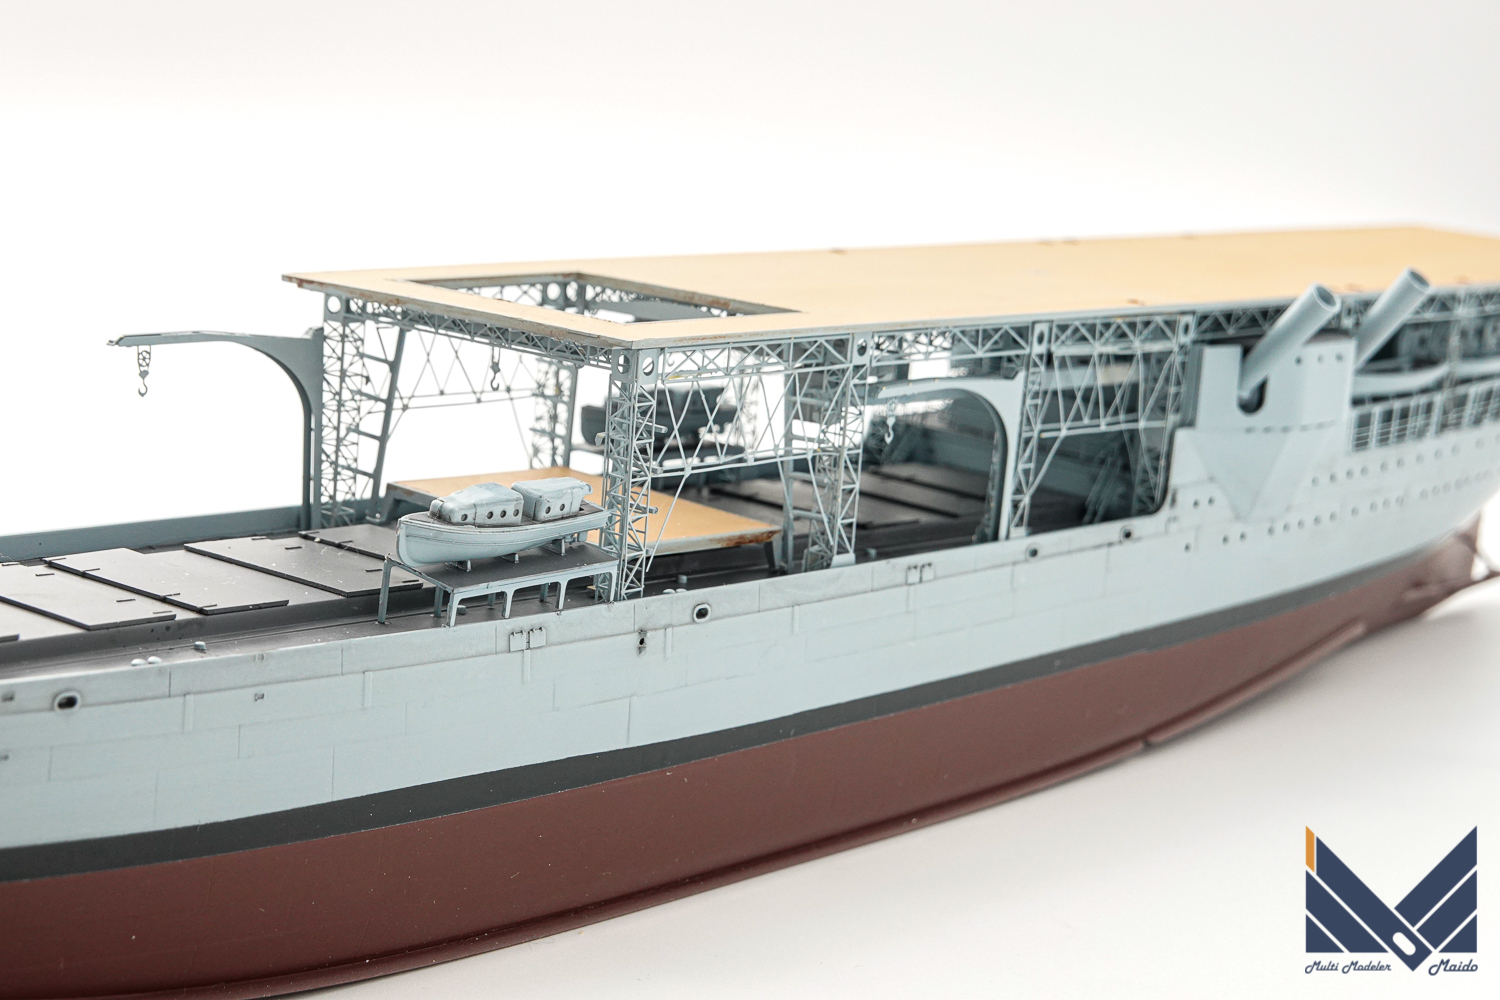
飛行甲板裏にトラスを先に取り付ける方法で組み立てました。しかし、何カ所は船体側パーツが干渉し組み立てられなかったので、トラスの一部を取り外して再接着しました。特に組立が難しかったのが、後部の配管の一部がトラスに入り込む箇所です。
もう一つがエレベーター周りのパーツです。このエレベーター周りは先にトラスを船体に組み立てても、構造的に取り付けは困難ではないかと思います。
この後飛行甲板裏側の縁のエッチングなどを取り付けていきます。完成時の長さや高さも確定したのでアクリルケースも手配します。
I assembled it by attaching the truss to the back of the flight deck first. However, some parts on the hull side interfered and could not be assembled, so I removed a part of the truss and reattached it. The part that was particularly difficult to assemble was the part of the rear piping that entered the truss.
The other is the parts around the elevator. I think that it is structurally difficult to install the truss around this elevator even if the truss is assembled to the hull first.
After this, we will attach the etching of the edge on the back side of the flight deck. Since the length and height at the time of completion have been decided, we will arrange an acrylic case.
投稿者プロフィール

-
模型好き。カメラ好き。各模型雑誌で掲載多数。
艦船模型、飛行機模型、AFV模型などプラモデル全般の制作代行も承っております。「お問い合わせ」からご連絡ください。製作代行ご案内のページは現在概要のみを公開しておりますが、2025年6月現在納期はご相談になりますが、制作代行可能です
 製作代行について(β版)2024年4月6日詳細な製作代行などはのちに追加しますが、お問い合わせのあった方の最初のご案内メールの定型文を記しておきます。製作依頼の流れ1 キットに入っているパーツのみでの制作は、定価×6を基本価格としております。 キットをお送りいただ...maidoworks.com2024.04.06
コメント